The OCI AI Language service is one of the new set of AI Services and it can provide valuable capabilities in the context of the OIC. I wrote about the language AI service in this post.
There are plenty of use cases where OIC could potentially benefit from AI Services, anomaly detection being an obvious one, but also language with the ability to detect sentiment, detect language and extract key words from text.
This post will focus for now on the technical side of setting this up in OIC. Later on I will bring more posts focusing on specific use cases.
Step 1: Create a Connection
This is similar to other Connections, like Object Storage and Functions.

The connection URL can be found here.

And here the usual required configuration details, like the OCID’s for user and tenancy, and the PrivateKey + Fingerprint. I covered this more in detail in previous posts (here). All the info is available in the documentation.

Step 2 : Create an Integration (Trigger)
For this example I will create an AppDriven Integration that takes a text as input, calls the AI Service for language detection (the simplest of all) and returns the result.


The input is only a text element.
{"text":"text"}For the response I want some details about the DetectLanguage result, hence I will return exactly what the AI Service returns.
{
    "languages": [
        {
            "name": "English",
            "code": "en",
            "score": 0.999992405558998
        }
    ]
}
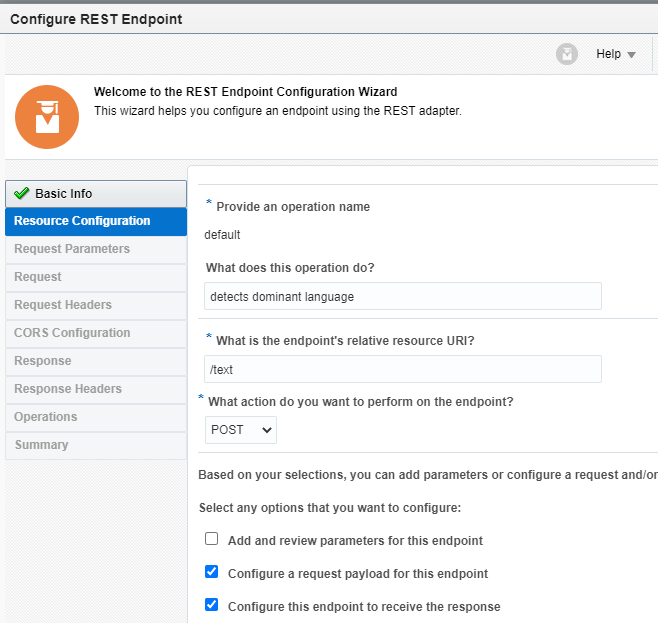
Step 3 : Call the AI Service
Now we drag the connection created on step 1.

The request and response are defined in the API documentation.

The input is only a text element.
{"text":"text"}

The response sample can be found in the documentation. It took mine from a POSTMAN response.
{
    "languages": [
        {
            "name": "English",
            "code": "en",
            "score": 0.999992405558998
        }
    ]
}
Ste 4: Mapping
This is pretty straightforward.


And below we map 1-1 the CallAILanguage response to the output.

Test
Ok, let’s put this to the test!

And with another language!

Notes:
The language service has several capabilities, like Sentiment Analysis, Key-Phrases extraction, Text-Classification etc. This was just a simple example on how to configure everything. In the upcoming posts I will cover some use cases that use these services.